Lesson 2: Enabling and Configuring Security Scans and Policies #
This lesson goes over the following:
- What security scans GitLab offers
- Adding security scans to the pipeline
- Configuring security scanners
- Enabling security training
- Setting up merge request (MR) approval policies (vulnerabilities)
- Setting up merge request (MR) approval policies (licenses)
- Injecting custom jobs using pipeline execution policies
What security scans GitLab offers #
GitLab offers a variety of security scans to enhance application security. Some scanners will scan the static source code, and others will scan the running application for vulnerabilities. Security rules are created by our Security Researchers
Security advisories related to software dependencies are managed in the GitLab Advisory Database[1] [1]https://docs.gitlab.com/user/application_security/gitlab_advisory_database/
GitLab provides the following security scanners:
- Static Application Security Testing (SAST): analyzes your source code for known vulnerabilities. Advanced SAST provides multi-file and multi-function analysis
- Dynamic Application Security Testing (DAST): analyzes your running application for known vulnerabilities
- Container Scanning: scans container images for known vulnerabilities
- Dependency + License Scanning: scans project dependencies for known vulnerabilities and detects licenses used by dependencies
- Secret Detection: Scans for secrets checked into source code
- Infrastructure as Code Scanning: Scans your IaC configuration files for known vulnerabilities. IaC scanning supports configuration files for Terraform, Ansible, AWS CloudFormation, and Kubernetes manifests
- Web API Fuzzing: Ssets operation parameters to unexpected values in an effort to cause unexpected behavior and errors in the API backend
- Coverage-guided Fuzzing: Sends random inputs to an instrumented version of your application in an effort to cause unexpected behavior
Upon completion the scanners provide the following information on a vulnerability:
- Description
- When it was detected
- Current Status
- Severity (CVSS, EPSS, KEV, Reachability)
- Location (including line of code)
- Scanner type
- Evidence
- Relevant links (Education/Training, Solutions)
- Identifiers (CVE, CWE)
- Request/Response (Dynamic scans only)
Adding security scans to the pipeline #
Security scanners can be added in 3 different ways, however the most common in by adding templates to the .gitlab-ci.yml which allows for full configuration using the GitLab job syntax. This project already has security scanners setup using the GitLab-provided CI templates as seen in the .gitlab-ci.yml:
include:
  - template: Jobs/Container-Scanning.gitlab-ci.yml
  - template: Jobs/Dependency-Scanning.gitlab-ci.yml
  - template: Jobs/SAST.gitlab-ci.yml
  - template: Jobs/Secret-Detection.gitlab-ci.yml
  - template: Jobs/SAST-IaC.gitlab-ci.yml
  - template: Security/DAST.gitlab-ci.yml
Adding CI templates to the .gitlab-ci.yml
Using the Security Configuration UI
Using 3rd party scannera, you can search for it in the CICD catalog or implement your own template. Learn more by watching Youtube - Integrating a custom security scanner with GitLab
Configuring security scanners #
Each scanner can be configured using environment variables, depending on the scanner there are different types of configurations which are possible. Additionally scanners can be configured with full control using GitLab CICD Job constructs.
See the application security documentation[1] for information on each scanner. [1]https://docs.gitlab.com/ee/user/application_security/
For example, if we want to configure our DAST scanner, we can do the following:
# Add the dast job to the pipeline with default settings
include:
  - template: Security/DAST.gitlab-ci.yml

# Overwrite the dast job provided by the template
dast:
  # Set the stage the job should run on
  stage: dast
  variables:
    # set the browser-based scan to true
    DAST_BROWSER_SCAN: "true"
  # have the full scan run on non-default branches only
  rules:
    - if: $CI_COMMIT_REF_NAME == $CI_DEFAULT_BRANCH
      variables:
        DAST_FULL_SCAN_ENABLED: "false"
    - if: $CI_COMMIT_REF_NAME != $CI_DEFAULT_BRANCH
      variables:
        DAST_FULL_SCAN_ENABLED: "true"
  # require deployment to kubernetes before running
  needs:
    - deploy-kubernetes
Enabling security training #
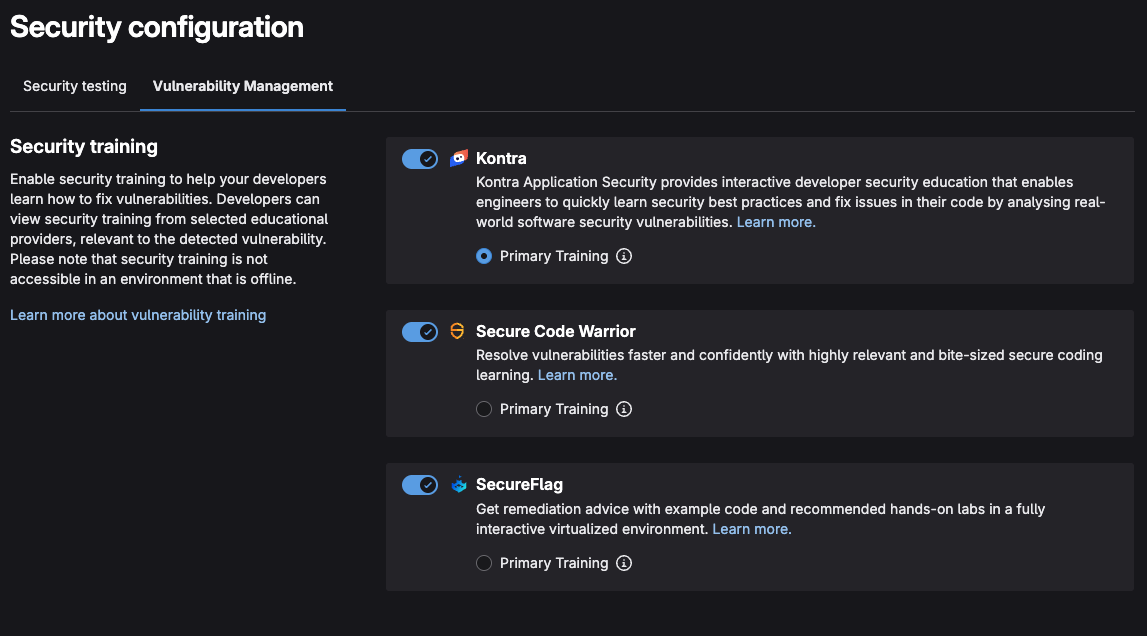
GitLab provides security training to help your developers learn how to fix vulnerabilities. Developers can view security training from selected educational providers, relevant to the detected vulnerability.
Go to the the Secure left navigation menu and press Security Configuration
Click on the Vulnerability Management tab
Check all the Security training providers
- Kontra: provides interactive developer security education that enables engineers to quickly learn security best practices and fix issues in their code by analyzing real-world software security vulnerabilities
- Secure Code Warrior: Resolve vulnerabilities faster and confidently with highly relevant and bite-sized secure coding learning
- SecureFlag: Get remediation advice with example code and recommended hands-on labs in a fully interactive virtualized environment
Setting up merge request (MR) approval policies (vulnerabilities) #
Code reviews are an essential part of every successful project. Approving a merge request is an important part of the review process, as it clearly communicates the ability to merge the change.
GitLab provides security guardrails to prevent vulnerable code from being merged without approval. These guardrails are known as Merge Request Approvals
Go to the the Secure left navigation menu and select Policies
Click on the New policy button
Press the Select policy button under the Merge request approval policy section
Fill out the following information:
- Name: require_maintainer_approval_for_detected_vulnerabilities
- Description (optional): Requires approval from maintainers before vulnerable code can be merged
Check the Enabled radio button under Policy status
Note that the policy scope is set to the
current project
Note: Policies can be also be created at the group-level where you will be able to scope it to different criteria.
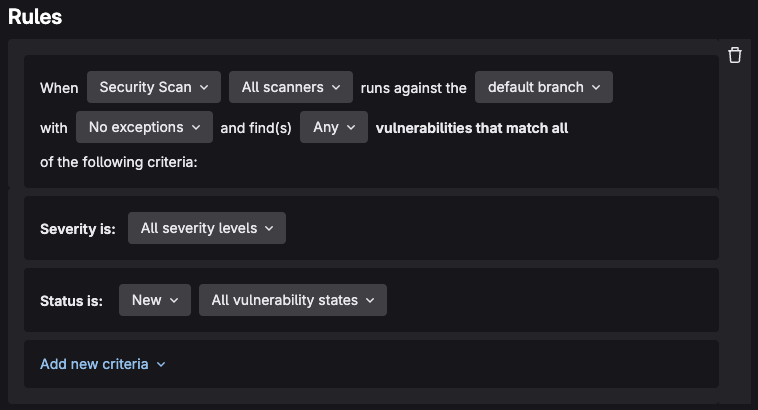
- Under the Rules section create a rule with the following specifications:
When
Security ScanAll scannersruns against thedefault branchwithNo exceptionsand find(s)Anyvulnerability that match all of the following criteria:
Severity is:
All severity levels
Status is:
NewAll vulnerability states
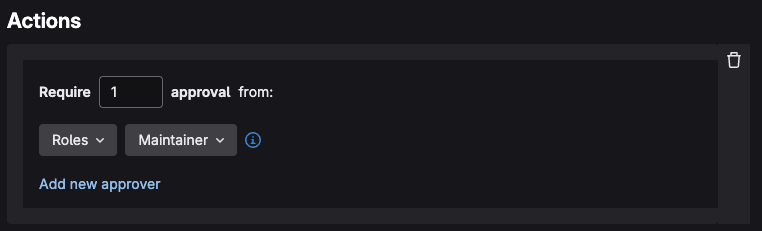
- Under the Actions section create an action with the following criteria:
Require
1approval fromRolesMaintainer
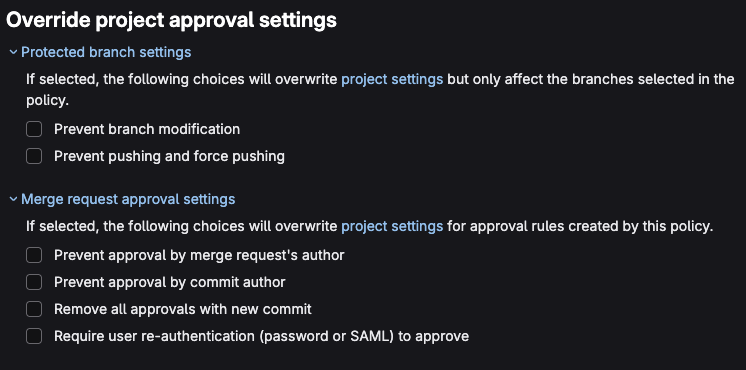
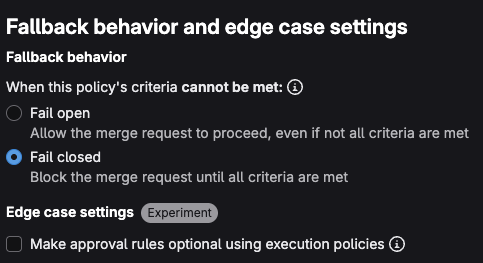
- Under Override project approval settings you can configure Protected branch and Merge request approval settings, let’s unselect all the default options.
- Under Fallback behavior and edge case settings select Fail closed to Block the merge request until all criteria are met
Press the Configure with a merge request button to create an MR to enable the policy, you will be taken to an MR in a separate project which will house the policies for this project.
Press the Merge button to create the policy.
Setting up merge request (MR) approval policy (licenses) #
Now let’s do the same thing, but require approval for restrictive/incompatible licenses.
Go back to your project
Go to the the Secure left navigation menu and press Policies
Click on the New policy button
Press the Select policy button under the Merge request approval policy section
Fill out the following information:
- Name: require_maintainer_approval_for_non_mit_licenses
- Description (optional): Requires approval from maintainers before non-MIT licensed dependencies can be merged
Check the Enabled radio button under Policy status
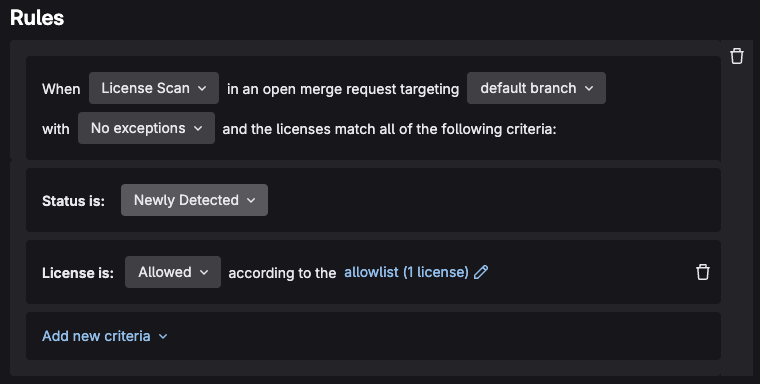
Under the Rules section create a rule with the following specifications:
When
License Scanin an open merge request targetingdefault branchwithNo exceptionsand the licenses match all of the following criteria:
Status is:
Newly Detected
License is:
Allowedaccording to the allowlistallowlist (0 licenses)
Select the allowlist (0 licenses) link
Select the Choose a license dropdown and select MIT License from the list
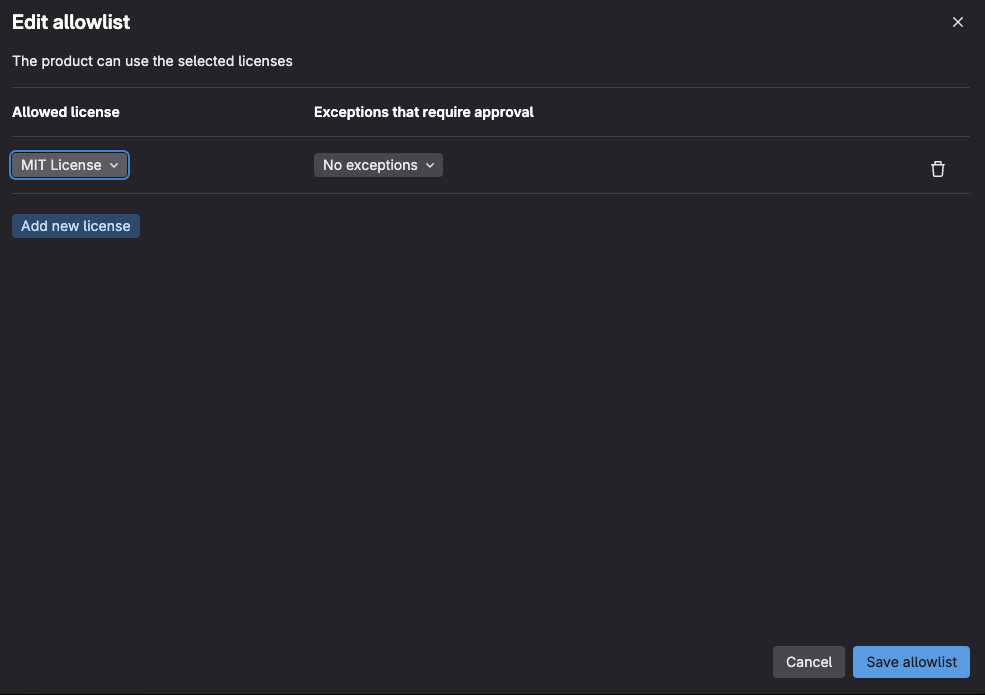
Press the Save allowlist button
Under the Actions section create an action with the following criteria
Require
1approval fromRolesMaintainer
- Under Override project approval settings you can configure Protected branch and Merge request approval settings, let’s unselect all the default options
- Under Fallback behavior and edge case settings select Fail closed to Block the merge request until all criteria are met
Press the Configure with a merge request button to enable the policy, you will be taken to an MR in a separate project which will house the policies for this project.
Press the Merge button to create the policy.
Injecting custom jobs using pipeline execution policies #
Now let’s create a Pipeline execution policy which allows us to enforce a custom CI/CD configuration to run in project pipelines.
Pipeline execution policies allow any custom pipeline to run (including security scanning), if you wish to only enforce security scanning, see scan execution policies[1] [1]https://docs.gitlab.com/user/application_security/policies/scan_execution_policies/
Importing the custom job demo project #
On the left side-panel click on Projects, or you can navigate to https://gitlab.com/projects/new
Select Import project
Press the Repo By URL button
Under Git repository URL add the following URL:
https://gitlab.com/gitlab-da/tutorials/security-and-governance/tanuki-shop-custom-pipelines.git
Under Project URL, select the group in which you have an Ultimate License
Under Visibility Level select Public
Press the Create project button
Wait for the project to be imported. It will take a few seconds. You should be redirected to the newly imported project along with the message The project was successfully imported
Creating a pipeline execution policy #
Go to your Tanuki Shop project
Go to the the Secure left navigation menu and press Policies
Click on the New policy button
Press the Select policy button under the Pipeline execution policy section
Fill out the following information:
- Name: inject_custom_soc2_echo_job
- Description (optional): Injects a custom compliance job to echo ‘SOC2 Compliance Check’ in our project
Check the Enabled radio button under Policy status
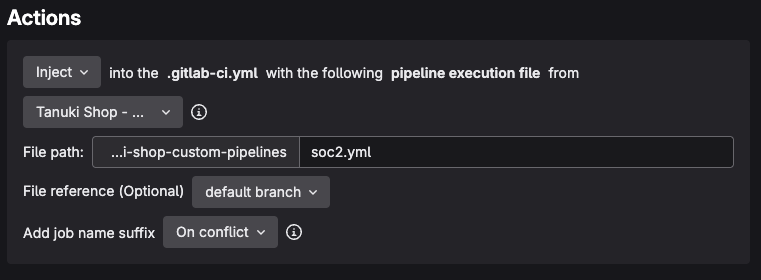
Under the Actions section create an action with the following criteria
Injectinto the .gitlab-ci.yml with the following pipeline execution file fromTanuki Shop - Custom Pipelines
File path: …/path/to/file
soc2.yml
File reference (Optional)
default branch
Add job name suffix
On conflict
- Leave the Additional configuration options as issues

Click on the Update via merge request button, you will be transported to the MR creation screen
Press the Merge button to enable the policy
Now that we have successfully setup our security scanners and policies, we can move on to going the DevSecOps workflows performed by developers.